A custom list item attribute matches any item from a list. But in some situations, you need the more sophisticated matching capabilities of a table (which you can think of as a list of rows). Each column in your custom table acts essentially like a list item attribute, with the added bonus that you can refer to other columns corresponding to the matching row in later conditions or in a rule’s actions.
For example, suppose you had a table with just two columns: “Name” and “ID Number.” If your rule condition looks for a match in the “Name” column, a “Rename” action could then rename the file with the person’s corresponding ID number from the second column. You could also make a more complex rule with multiple conditions. For instance, say your table had a third column: “Favorite Color.” Your first condition could match against the “Name” column, and a second condition could take action only if the text in the same row of the “Favorite Color” column is “purple.” (For yet another example, see “Sort Files into Subfolders Based on Extension” in Using Custom Attributes in Actions .)
To create a custom table attribute:
-
Create a condition with an attribute (such as “Name,” “Extension,” or “Contents”) that uses a match-related verb in the second pop-up menu (“matches”/“does not match,” “match”/“do not match,” or “contain match”/“do not contain match”).
-
Drag the “Custom Table ( ☷ )” token to the pattern field.
-
Type a name for your custom table.
-
From the “Table Items” pop-up menu, choose one of the following:
-
“embedded”: You enter the table items manually within Hazel.
-
“from file”: Hazel uses the contents of an existing text file for the table contents.
-
Follow the instructions below for the method you chose.
To enter an embedded table:
-
Rename “Column 1” as your first column name. To do this, select “Column 1,” wait a second, and then click it again to make it editable. Type in the first column name, and press Return.
-
To add another column header, with the first column selected, press Return. Then type a name for the second column and press Return. Repeat as needed to create more columns.
-
In the first row, rename “Item 1” with your desired value. To do this, select “Item 1,” wait a second, and then click it again to make it editable. Type in the text you want, and press Return to accept it, or Tab to enter the text for the second column. Repeat for each item in that row.
-
Add more rows. To do this, either select the first row and press Return, or hover over the row and click the add
 icon. Enter the items in the new row; repeat as needed.
-
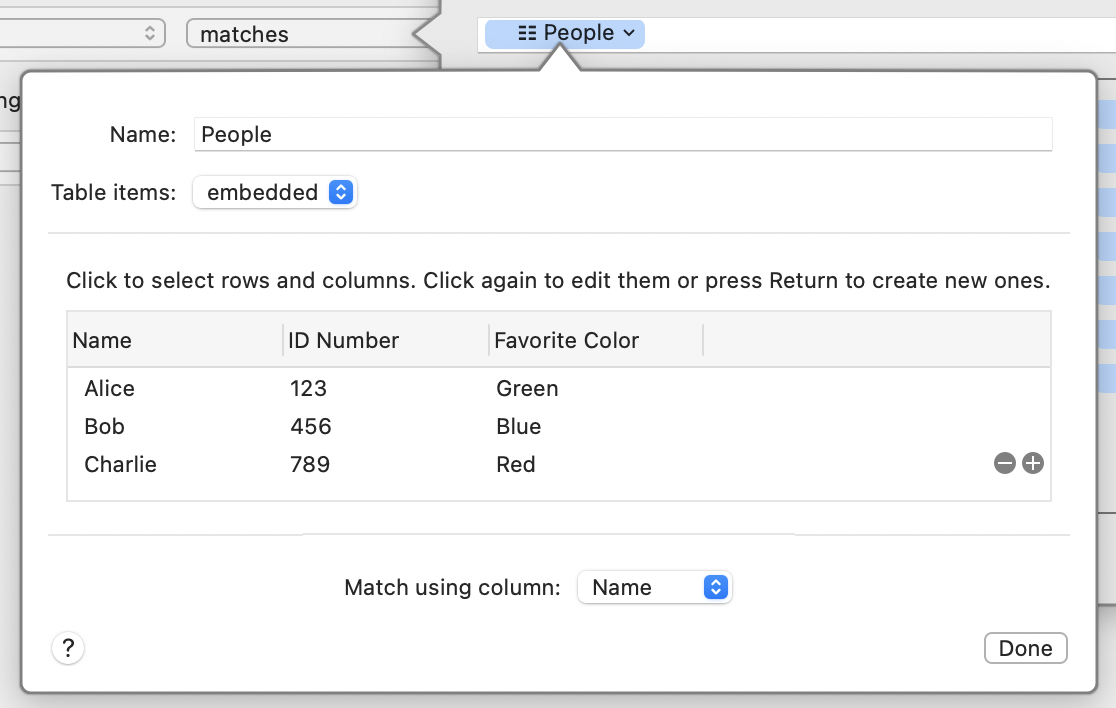
From the “Match using column” pop-up menu, choose which column this particular instance of the table should match against in your rule condition.
-
Your finished table may look something like the image below. When you’re finished, click “Done,” and then make any further desired changes to your match pattern.
To use a table from a file:
-
Click “Choose,” navigate to a text file containing your table, and click “Open.”
-
Hazel attempts to determine which character (such as a comma or tab) separates columns within in a row. If you need to change this character manually, choose either “Newline” or “Tab” from the “Items separated by” pop-up menu. You can also type a character, such as a comma, in the “Items separated by” field. A preview shows how Hazel interprets the contents of your text file.
-
If the first line of the file contains column names, select “First line contains column names” to use those as the column names in your table. Otherwise, name the columns manually (if desired) by selecting a column header, waiting a second, clicking, and typing a new name.
-
From the “Match using column” pop-up menu, choose which column this particular instance of the table should match against in your rule condition.
-
If you select “Trim blank characters,” Hazel ignores whitespace characters on either end of any text from a field in a list item.
-
Click “Done,” and then make any further desired changes to your match pattern.
To rename a column:
-
Select the existing column header, wait a second, and then click it again to make it editable. Then type a new name and press Return.
To add a column, do either of the following:
-
Select an existing column header and press Return.
-
Hover over an existing column header and click the add
icon.
To remove a column, do either of the following:
-
Hover over it and click the remove
 icon.
icon.
-
Select it and press Delete.
To add a table row, do either of the following:
-
Hover over an existing row and click the add
icon.
-
With an existing row selected, press Return.
To remove a table row, do either of the following:
-
Hover over it and click the remove
icon.
-
Select it and press Delete.
SEE ALSO
Using Match Patterns in Conditions