Animation in the Time of Tiger: Part 2
As promised, here’s part 2 of my animation miniseries. The topic for today: NSViewAnimation
In the last segment, we talked a bit about using NSWindow’s -setFrame:display:animate: method to do some window animations. In conjunction with setting the autoresize flags, you can get some nifty effects.
Many times, though, you need more control. Maybe you want to animate some views (not just windows) or maybe you want to change the rate of animation. For such cases, NSViewAnimation is the answer. NSViewAnimation allows you to set up dictionaries containing views or windows with their start and end states and then animate them. Since it is an NSAnimation subclass, you have control over whether it blocks, how long it takes, the animation curve, etc. If you aren’t familiar with NSViewAnimation, I suggest reading the docs and playing with it yourself.
Now, there are a couple quirks/bugs you need to keep in mind. Knowing these will save you some headaches:
- If a view has a final frame with a zero dimension (width or height), NSViewAnimation will set it to be hidden when the animation finishes. If you use that view again in an animation (like doing a reverse animation of what you just did), NSViewAnimation will not unhide the view for you. You have to do
setHidden:NOyourself before starting the animation. The exception to this is if you use a fade in effect, in which case, NSViewAnimation will unhide the view. - NSAnimationCurveEaseOut is broken. It seems to animate backwards. Yes, you can try and work around it and swap the beginning and end frames and such but, when Apple does fix it, you’ll be in for a surprise. I say just avoid using it.
For the purposes of this article, we will be using this project. It demonstrates animating between two views using a variety of basic transitions. If you use Keynote, these should be familiar (I’ve even used the Keynote names). The Dissolve transition needs little explanation; NSViewAnimation’s NSViewAnimationFadeInEffect and NSViewAnimationFadeOutEffect work as advertised. The other effects are variations on a right-to-left transition. They are different combinations of the views either moving in/out of bounds or being revealed or covered. This is achieved through use of clipping (via the view hierarchy) and the autoresizing masks.

Basically, we have two “viewport” views. In doing a transition from right to left, we shrink the left view while expanding the right. Their main job is to clip the view they contain. When used in conjunction with the resizing masks, you can get different effects, the diagram above showing a “Move In” transition.
In the diagram here, the blue rectangle is the superview (viewport) of the visible view. I’ve made the rect larger than the view to show the resizing springs/struts but in actuality the viewport is the same size as the view (i.e. its bounds are flush with the contained view). In this case, we have a viewport with a containing view whose left margin is resizable but the right margin is fixed.

Now, let’s say the viewport starts at zero-width and expands out to the left while the view itself is positioned so that it’s right edge is flush with the viewport.
As you see, since the right margin is fixed, it appears as if the view is being revealed as the viewport expands to the left. Note that the autoresizing works just as well when the view is larger than its superview.
To make it appear as if the view is moving in towards the left instead (like in the “Move In” and “Push” transitions), make the left margin fixed and the right margin resizable.
Likewise, you can fiddle with the autoresize masks for the outgoing view to affect how it disappears (either pushed off or covered).
For those unable to compile the project, here’s what it all looks like:
As you can see, NSViewAnimation can be quite useful for when your animations involve moving and scaling views. In the next article, I’ll probably just go over some odds and ends such as optimizations and using Core Image transitions.
Category: Cocoa, Downloads, Programming 9 comments »
September 4th, 2007 at 1:30 am
So cool. I was wanting something like this just the other day to help me save real-estate on some controls. I wanted something a bit classier than a tabbed interface…
Let me think…..
September 4th, 2007 at 1:02 pm
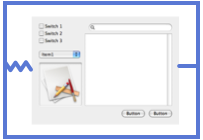
Quick question and not to sound dumb. When looking at your NIB file, you have your two custom views sitting in a window but I find no associated Window object that they belong to. I have always had to create a “dead” window and put my views in that grouped by a box view (with no borders). How did you create the free standing views View and View1????
Steven
September 4th, 2007 at 1:28 pm
Steven, you just drag a “custom view” into the instances tab of the nib contents window. Those views aren’t sitting in windows, they’re just freestanding views. IB shows them in windows for convenience but they only show up in the app because they get added as subviews.
Mr. Noodle, thanks for this. I was not aware of NSView’s -setAutoresizingMask:, and I’m sure it’ll come in handy.
A related example is Apple’s “Reducer” demo code, which includes an NSTabView subclass that animates transitions between its views. It’s on Apple’s site at http://developer.apple.com/samplecode/Reducer/index.html
September 4th, 2007 at 3:44 pm
Steven: Looks like Tom beat me to the punch. But thanks for your comments.
Tom: I was actually going to bring up the Reducer example in my next article as I was going to mention the CoreImage transition filters. I’ll probably still talk about it but the surprise is blown. Maybe I’ll throw in some OpenGL…
September 8th, 2007 at 5:19 am
Wow, nice. Thanks for this example. And what perfect timing! I was planning on trying to implement exactly this effect tonight, and it was great to have an example to follow.
I have noticed an issue, and was wondering if you had any thoughts. I am doing the “Push” transition, with 2 views that have a solid background, and I want their edges to be touching. It looks like frames of the animation are drawn where one view has moved, but the other hasn’t, so that there is a gap between the two views, or they can be overlapped slightly.
To recreate this your example, I edited the nib to make each of your subviews have a solid color in the background (by putting a NSTextView behind everything, making it the full size of the view, setting its background color, and turning off the scrollbar), and put another solid background behind everything in the main window in the same way (preferable all different colors). Then I slowed down the animation by putting
[animation setDuration:(NSTimeInterval)3.0];
in Controller.m:203. Then do the push transition, and you can see it, but only on every other swap (I think because you can only tell when they have a gap, and not when they overlap). I was wondering if you knew of any tricks to sync the animation, or otherwise deal with this. The weird thing is that if you don’t put that background in the main window (and just put a background on each subview), then you don’t see any gap. Maybe there is another subtlety that’s causing this?
Also, are there any tricks to make the animation run smoother? Mine are pretty choppy, especially when the window is big. It looks like the subviews are getting redrawn at each step of the animation (though, I’m not sure what exactly is triggering the redraw. Should it not be doing this?). To reduce the cost of redrawing, I was thinking of creating a NSImage with a bitmap snapshot of each subview, and animating with those instead. Or somehow otherwise manually forcing them not to draw themselves during the animation. Or am I just doing something wrong? Alternatively, I could put the subviews side-by-side in an NSClipView and just scroll that (with setCopiesOnScroll:YES), but then I miss out on all this nice NSViewAnimation stuff.
Finally, you mention the CI transitions, and I’ve played with some of those (from the example code here: http://dev.lipidity.com/apple/core-graphics-meet-core-image-demo-app ), but all of the non-cheesy transitions are the CG ones, which move the whole window. Do you know if there is a way to do the CG transitions (CGFade, CGSlide, etc) just within the window bounds?
Thanks again for this example.
September 8th, 2007 at 9:16 pm
Kelan, you can try out Matt Gemmell’s MGViewAnimation. Its far more performant than NSViewAnimation. http://mattgemmell.com/2006/11/13/mgviewanimation
September 12th, 2007 at 11:21 pm
Kelan: Thanks for the comments. Yes, there are things you may need to do to optimize it as the views will get redrawn. For some types of animations this is unavoidable (like you are resizing a view and want it to re-layout its subviews as it resizes) but in others, where you are basically just moving it, you would probably want to use a bitmap of the view. My next post in the series is going to talk about that (but yes, in general, this means not being able to use NSViewAnimation).
Or you could just use MGViewAnimation, as Joe suggests.
January 24th, 2009 at 3:48 pm
I am using NSViewAnimation using a queue (NSMutableArray). I am seeing a weird bug where I run the animation once (on a window close), and everything is fine, but when I then quit my app (and subsequently send a message that disposes of the animation and the queue, I see the same animation run again even though the window is already gone. For the life of me, I can’t figure out what’s causing it. Very weird.
April 14th, 2009 at 8:49 pm
Having problem with this. When I run it in my own program, no matter which transition I try, it seems to work but just resets straight back to the original view rather than staying on the new one? Why? 🙁